
\[[Wikipedia](https://en.wikipedia.org/wiki/Wardriving)\]
Hardware
- Raspberry Pi 4
- 3 USB WiFi modules (RTL8188FU based) \[[AliExpress](https://a.aliexpress.com/_Ev15jkB)\]
- USB GPS module (generic) \[[AliExpress](https://a.aliexpress.com/_EQ1EmeJ)\]
- USB hub (generic) \[[AliExpress](https://a.aliexpress.com/_EjJvyRZ)\]
Software
Base image
https://www.raspberrypi.com/software/operating-systems/
Raspberry Pi OS Lite (Legacy)
Release date: May 3rd 2023
System: 32-bit
Kernel version: 5.10
Debian version: 10 (buster)
RTL8188FU driver
In order to use the RTL8188FU modules in monitor mode, the drivers have to be compiled manually. This process is described in my post RTL8188FU Monitor Mode.
APT packages
apt-get install neovim jq gpsd kismet
gpsd
gpsd shoud automatically detect the USB GPS module. You can check on it using:
while read line; do jq '.' <<< $line; done < <( { sleep 3; echo -e '?WATCH={"enable":true,"json":true}\n' } | nc localhost 2947 )
RaspAP
curl -sL https://install.raspap.com | bash -s -- --minwrite
Configure at http://<device_ip>
User: admin, Pass: secret
- Configure WiFi AP to use builtin WiFi Module
- Preferably on 5Ghz to avoid interfering with 2.4Ghz monitoring
- Set gateway to
0.0.0.0- Devices connected will use other interfaces (such as mobile data on smartphones) to access the internet and only use the AP to connect to the Raspberry Pi
Main script
Crontab
@reboot /root/run.sh >/root/run.log 2>&1
run.sh \[[file](run.sh)\]
#!/bin/bash

# Wait 30 seconds for interfaces to be detected and come up etc.
sleep 30

# Change the working directory
mkdir -p /home/pi/kismet
cd /home/pi/kismet

# Create kismet_custom.conf using kismet_wardrive.conf as template
cp /etc/kismet/kismet_wardrive.conf /etc/kismet/kismet_custom.conf

# For each wireless interface
while read interface; do

    # Try to set interface to monitor mode
    # If successfull add the interface to kismet_custom.conf
    /usr/sbin/iw "$interface" set type monitor && echo "$interface" && \
        echo "source=$interface:name=$interface" >> /etc/kismet/kismet_custom.conf

done < <(find /sys/class/net -follow -maxdepth 2 -name wireless 2> /dev/null | cut -d '/' -f5)

# Start http server on port 8000
python3 -m http.server &

# Get data from gpsd
{
    sleep 3
    # Enable watch mode
    echo -e '?WATCH={"enable":true,"json":true}\n'
} | nc localhost 2947 | {
    while read -r line; do
        # Set the system time from gpsd output (UTC)
        date -u -s "$(echo "$line" | jq -r '.time')"
        # Continue if 3d fix aquired (mode == 3)
        echo "$line" | jq -r '.mode' | grep -q '3' && break
    done
}

# Start kismet with kismet_custom.conf as config
kismet --override custom > kismet.log &
Usage
Kismet will automatically start once the WiFi interfaces are in monitor mode and there’s a 3d GPS lock, so it really is plug-and-play.
Kismet can be checked on and configured by connecting to the AP and browsing to http://<device_ip>:2501.
The Kismet-*.wiglecsv files can be downloaded at http://<device_ip>:8000 and uploaded to wigle.net without further processing.
To avoid SD card corruption the Raspberry Pi should be shutdown before removing power. This can be conveniently done in the RaspAP interface at http://<device_ip>.
Visualizing the data
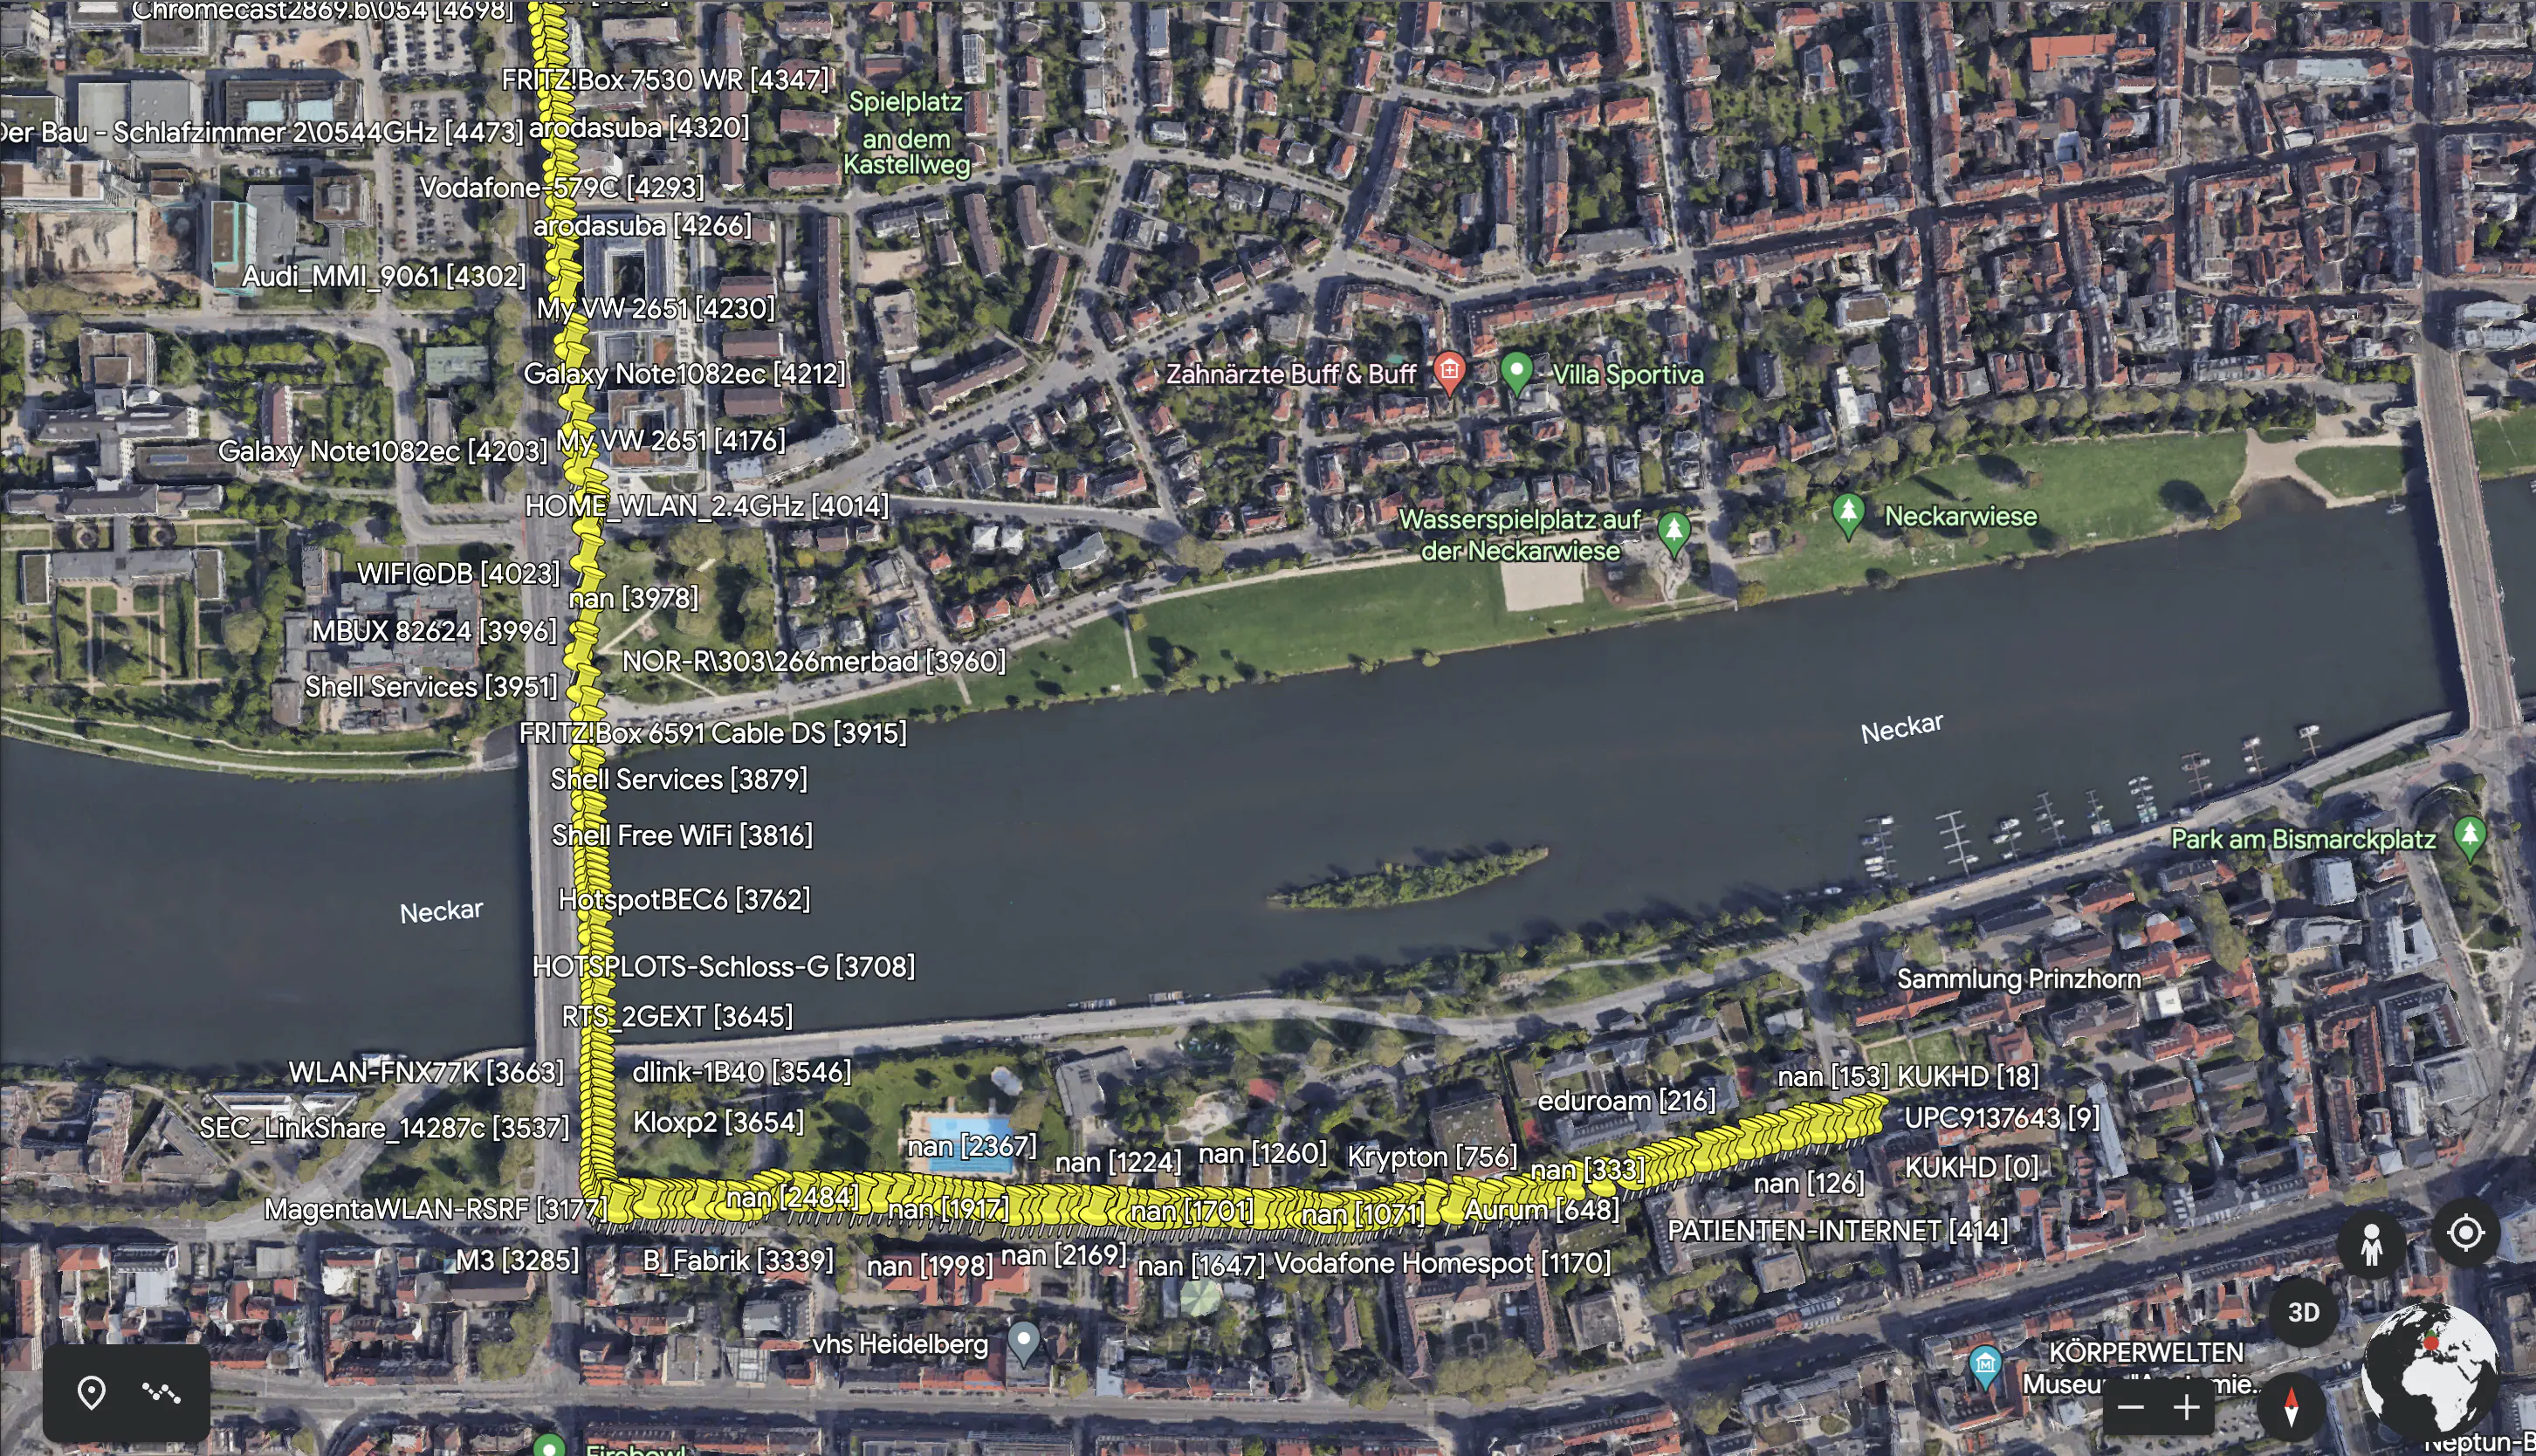
To visualize the data before uploading it to wigle.net the following script can be used. It generates kml files from Kismet-*.wiglecsv files, which can then be imported and viewed in Google Earth.
Install requirements
pip3 install pandas simplekml
wiglecsv2kml.py \[[file](wiglecsv2kml.py)\]
from os import listdir
import simplekml
import pandas as pd

def write_pandas_to_kml(dataframe, output_file, title):
    # Create a KML object
    kml = simplekml.Kml(name=title)

    # Iterate over the rows in the DataFrame
    for index, row in dataframe.iterrows():
        # Extract the necessary data from the row
        latitude = row['CurrentLatitude']
        longitude = row['CurrentLongitude']
        description = '%s\n%s\n%s' % (row['MAC'], row['FirstSeen'], row['AuthMode'])

        # Create a KML point and add it to the KML object
        point = kml.newpoint()
        point.coords = [(longitude, latitude)]
        point.description = description
        point.name = '%s [%i]' % (row['SSID'], index)
        point.open = 1

    # Save the KML object to a file
    kml.save(output_file)

for filename in sorted(listdir('.')):
    if filename.endswith('.wiglecsv'):
        continue

    data = pd.read_csv(filename, skiprows=1)

    # Only show ~1000 points
    n_skip = int(len(data) / 1000) + 1

    print('%s [%i]' % (filename, len(data)))
    write_pandas_to_kml(data.iloc[::n_skip, :], filename + '.kml', filename)
Opening kml file in Google Earth
Projects > New Project > Import KML file from computer
Comments
This blog does not currently have a comment function. You can send me an email to [email protected] instead and I will add it here.